Lab 1 – Deploy a simple reverse proxy service
This lab will teach you how to configure resources including Virtual Servers, Pools, and monitors that we will use as the foundation for subsequent labs.
Note
Lab Requirements:
- BIG-IP with APM licensed and activated
- Web site up and running at 10.128.20.200:80, 10.128.20.201:80 and 10.128.20.202:80
Task – Create a pool
Follow these steps to complete this task:
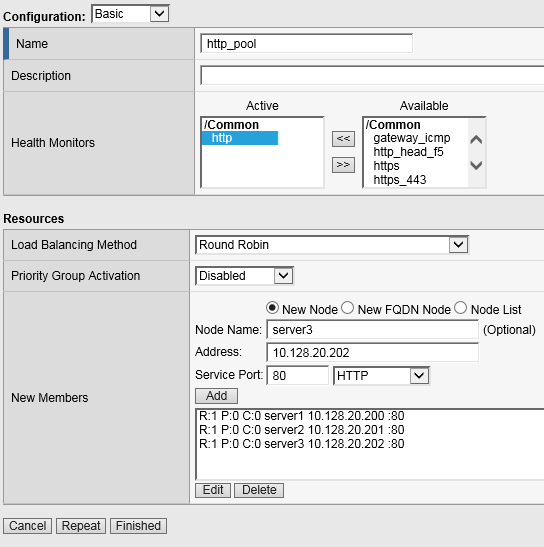
Browse to Local Traffic > Pools and click the ‘+’ next to Pools List to create a new pool.
Name the pool in “http_pool”
Assign the monitor “http” by selecting it and sliding it to the left.
Add the following “new node” members to the pool, then click Finished:
- Node Name: server1, Address: 10.128.20.200, Service Port 80
- Node Name: server2, Address: 10.128.20.201, Service Port 80
- Node Name: server3, Address: 10.128.20.202, Service Port 80
Task - Create HTTP Virtual Server to redirect to HTTPS
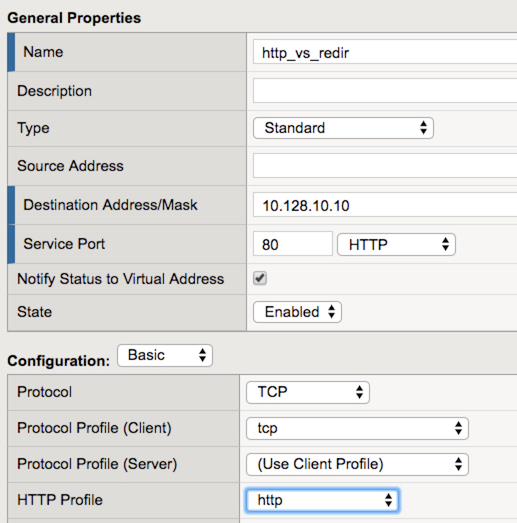
- Create a new Virtual Server by browsing to Local Traffic > Virtual Servers > Virtual Server List and click the ‘+’ to create a new one.
- Name the Virtual Server in the following format http_vs_redir. For “Destination Address/Mask”, use 10.128.10.10”. For “Service Port”, use 80.
- For “HTTP Profile” choose the default http profile called http
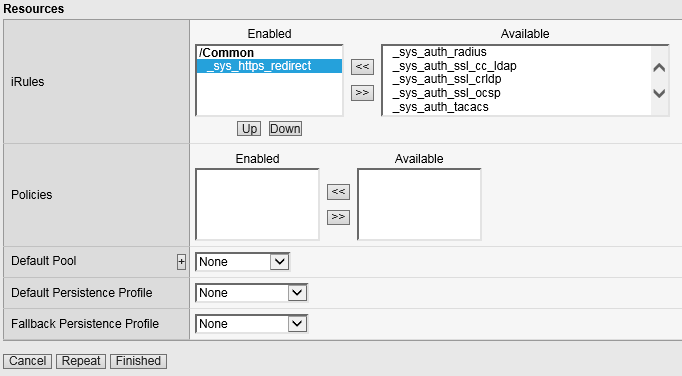
- Under iRules at the bottom of the screen, select the sys_https_redirect irule from the “Available” list and slide it over to the “Enabled” list and click Finished.
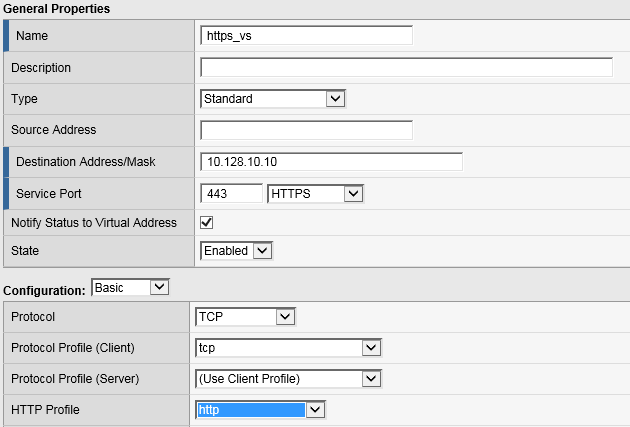
Task - Create HTTPS Virtual Server
- Create a new Virtual Server by browsing to Local Traffic > Virtual Servers > Virtual Server List and click the ‘+’ to create a new one.
- Name the Virtual Server in the following format https_vs .
- For “Destination Address/Mask”, use 10.128.10.10. For “Service Port”, use 443.
- For “HTTP Profile”, choose the default http profile
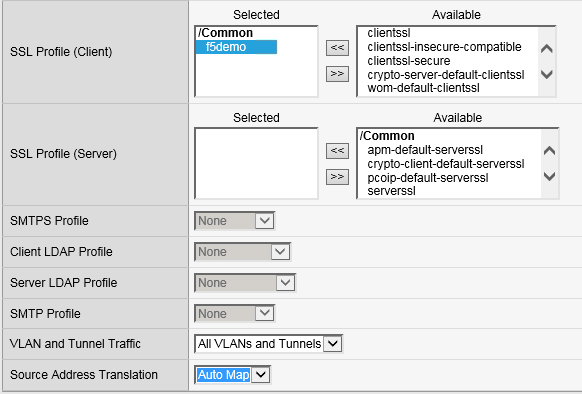
- For “SSL Profile (Client)”, choose the f5demo, slide it over to the “Selected” column
- For “Source Address Translation”, choose Auto Map
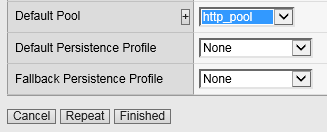
- For “Default Pool”, select the pool created earlier (http_pool) and click Finished.
Task - Testing
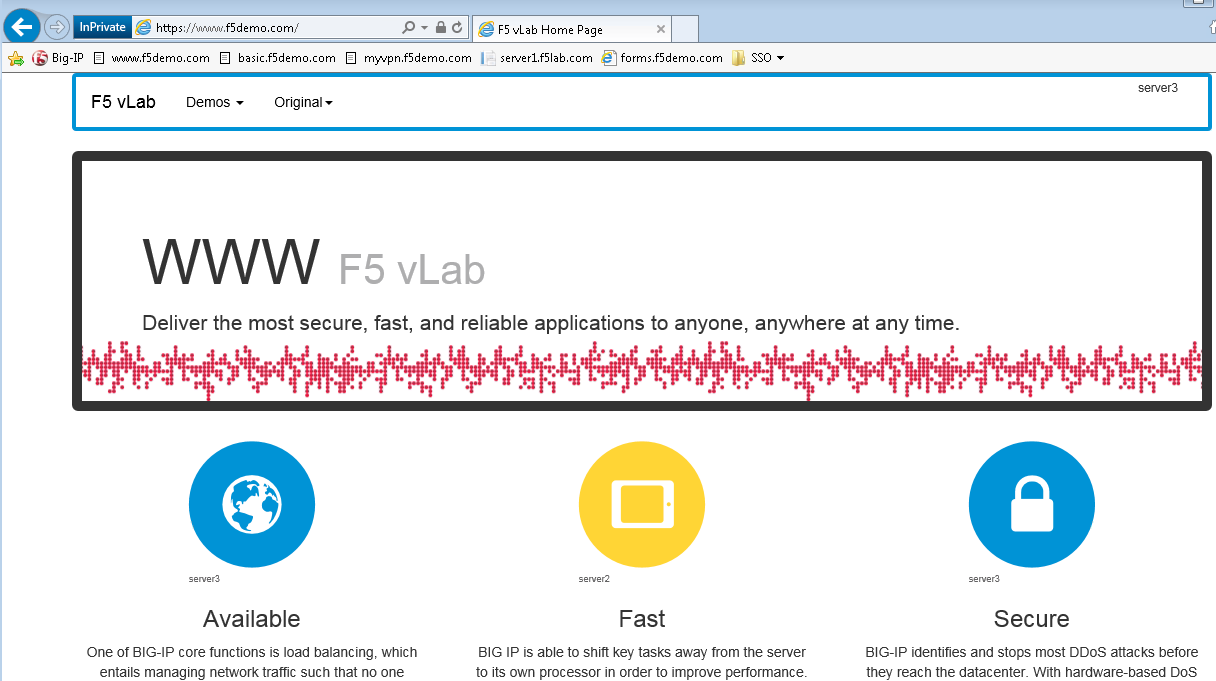
You should now be able to browse to either Virtual Server (HTTP or HTTPs) and you should get the same page. Try: http://www.f5demo.com and https://www.f5demo.com